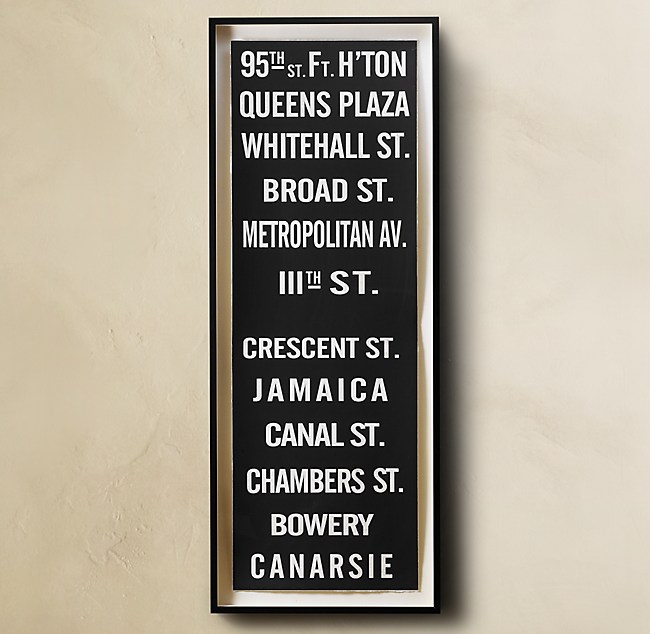
Introducing my lastest project of love...subway art. I have seen in lately on all of the blogs I stalk look at. For months I have just been pondering the idea of how I would go about the whole subway art thing. I googled and found this one from Restoration Hardware
The lovely price tag you ask? $850 (yikes!)
So, I took this beauty as my inspiration.
Supplies:
plywood
contact paper
spray adhesive glue
paint or spray paint
Since our redo of our room I needed to fill one of our walls
with something that would bring happiness every morning when
I woke up. These are words that are close to my heart...
Live a little- reminds us to live in today not tomorrow
1910- our baptism date
Jumbo- hello in Swahili
London- because sometimes we think we left our hearts there
Strong Enough- 1st song we heard after the miscarriage, isn't it fitting?
Nairobi Kenya- another place we believe are hearts could be
I will follow- reminds us to strive to be obedient
The Way- symbols the youth in our church
So I took all of those words of inspiration and used Photoshop (thanks santa)
to compile them, then Kinkos printed it off the same size as my wood.
Then we headed to Lowes to pick up some wood. Mine ended up being 22x44.
I think next time we will shoot for a 20x42.
Now if you have a handy husband he can do all the no good work, such as sanding.
You would have thought he brought me home diamonds. The edges
and front were perfectly soft :)
Cut your words into strips. Use spray adhesive to glue your sections of words on.
Make sure your are putting the adhesive on the front of the contact paper
(not the gridded side)
Grab a glass wine and start cutting those letters out
This took me a couple of nights on the back porch, Is it wierd to say that
it was relaxing?
Now start painting white on your board. I had a little
helper for this one. Two coats of Kilz I had on hand covered it.
It was prolly due to that awesome sanding job.
At this point peel the gridded part off your letters and
stick em on. I then painted over my letters with a
Martha Stuart sample from Home Depot. If you
are feeling dangerous, paint, if not, SPRAY PAINT!!
My paint seeped through and I had to re-do every letter!
Now the fun part, peel your letters off.
See all of the paint touch ups I had to do??
Repeat after me. I will not do this next step.
That's right. I spilled the grey paint. Lucky for me I was able to
get a huge chunk of it up before it all dried.
The end product turned out just how I wanted...
It's the second thing I see in the morning, the first being my sweet
little girl but every morning it brings a smile to my face.
What great words of encouragement and hope to start your day!
Pin It


 Welcome to my little piece of happiness.
I am a full time wife to my high school love Bret,
and momma to our sweet girl Kk(6). I keep myself busy with homeschooling our kindergartener, making
our house a home, and trying new Diy projects. :)


No comments:
Post a Comment